howto

DIY Passport Photos

2012-05-22-19-05-21_E8663C4D-9E9A-423F-9E6A-496AAEF9CD78

As we travel for the next few years, we’ll be entering dozens of countries. Each country has different requirements for entry; some are very easy, some require significant effort. If you're American and interested in determining what you need to have in order to enter a country, the best source I’ve found is the US State Department website.

One of the semi-common requirements for entry into a country is to obtain a visa. In preparation, we needed to get a bunch of passport photos. If you haven’t gotten passport photos before, you can go into almost any pharmacy, walmart, AAA, or even photo booth to get them. They typically cost around $10 for two 2x2inch photos. This is a complete and total rip off when you can get a copy of normal photos for pennies.

We wanted to get 10 photos each, which would cost nearly $100 if we went with one of the traditional passport photo options. This was unacceptable and we decided that there had to be a more economical way. What follows are step by step instructions for how we made Do It Yourself Passport Photos:

  1. Procure a digital camera, light source, empty white or off-white wall, computer with internet connectivity, and a photo buddy
  2. Have your buddy take your picture up against the wall. Some tips:
    • Stand close to the wall so that the shadow is minimized as much as possible
    • Put the light source above you to ensure the photo is well illuminated
    • Make sure that your buddy gets most of your chest and has plenty of room on the sides and top of your head
  3. Now, to the computer! Copy your photos onto your computer and visit the State Department page on passport photos
  4. Scroll about 2/3 of the way down and click “Start Photo Tool”
  5. Click “Choose Photo” and select the picture that your buddy took
  6. Follow the instructions on the screen and get your head aligned into those lovely green ovals
  7. Click “Crop Photo”
  8. Click “Save Photo”
  9. In your photo editing application of choice, create a new image that is 4 inches by 6 inches and add this photo to it. You should be able to fit it on twice so that you don’t need to print as many copies
  10. Save the new image to your SD card and bring it in to your nearest one hour photo department (we used Walmart). Print out the necessary number of 4x6 pictures

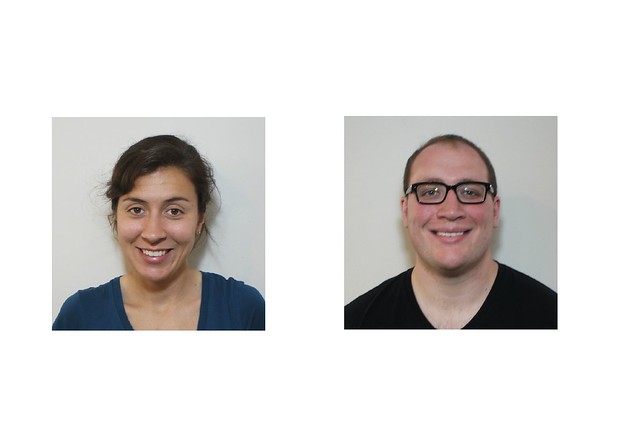
Instead of $100 we spent $2.80 for 10 passport photos of each of us.

For your viewing enjoyment, here are our passport photo bloopers (most of which are me being angry at Jordan for sucking at being a photo buddy):
2012-05-23-06-00-22_56DDE6F8-EB03-4009-B8F2-FB3E171F180E
2012-05-23-06-03-00_2E0E6CA9-1892-4B86-8B49-0AD2294C9520
2012-05-23-06-02-42_7CC9E409-3E12-47FA-904A-783E7568D709
2012-05-23-06-03-57_7C6347F0-6051-4CF9-A2D0-7439CD6D7AD5

HOWTO: Getting to Ecuador from Colombia

Anyone who knows me know that I am a planner. I don't mean in the sense that I have to know what I am doing every minute of the day, but when it comes to crossing our first border by bus... I wanted to know how to do it. We were about two hours from the border of Ecuador in Pasto, Colombia. We still haven't gotten a good grasp on Spanish, which makes traveling with multiple transfers nerve wracking for me. People coming up to you, shouting at you, and shoo-ing you to their bus, cab, or collectivo is a little terrifying when you have no idea what they are saying or where you might end up if you get it wrong. I searched google, lonely planet, wiki travel, and various forums for a how-to guide when it came to crossing into Ecuador from Pasto, and was met with only dead ends. So I've decided to write my own. It won't be overly witty, but will hopefully help someone else who is as neurotic as I am. After our 20 hour bus ride from Bogota to Pasto, we spent a few nights at the Koala Inn to recoup. Once I had cobbled together a plan, we were ready to take on our first border crossing. The steps are as follows:

Get thee to a supermarket to get some snacks for the ride. My recommendations are oranges, graham crackers, animal crackers, and nuts. (My former coworkers know that my go-to snacks are always "fruit and nuts")

Take a taxi from Koala Inn (or wherever you are staying) to the Terminal de Transportes de Pasto (bus terminal): 3.500 COP

Enter the bus terminal from the main entrance. Take a right and there will be a few bus companies that will take you to Ipiales. We used Supertaxi: 12.000 COP. Note: If you take a left instead of a right once you're in the main entrance, you will go into a long hallway where people from various companies will hang out of their stalls and scream at you as you walk by. I have no idea if they are cheaper or legitimate, but I just tried to avoid it all together.

Take a white collectivo bus or a taxi to customs at Rumichaca. Be sure to tell the driver that you need immigration so they don't send you straight to Ecuador's customs without getting stamped out of Colombia first. We chose to take a taxi (6.000 COP) instead of the collectivo because it was jammed full of people and we had all of our gear with us.

Go inside to get stamped out of Colombia. Walk across the bridge to Ecuador's immigration office and get stamped in.This is the part where we walked past people exchanging currency, one of whom was holding a rubix cube. Daniel immediately asked the man for it, and began to solve it. A crowd of ten or so people gathered around while he worked his nerd magic. When he was able to solve it, the crowd cheered and shook his hand.

Take a collectivo or taxi to Tulcan (again, we chose a taxi; 7.000 COP)

From Tulcan, we got a bus into Otavalo ($6). You could also go to Quito if you were so inclined.

**All prices listed are for 2 people, in COP while in Colombia and in USD in Ecuador.